Setup
Ubuntu WSL 2
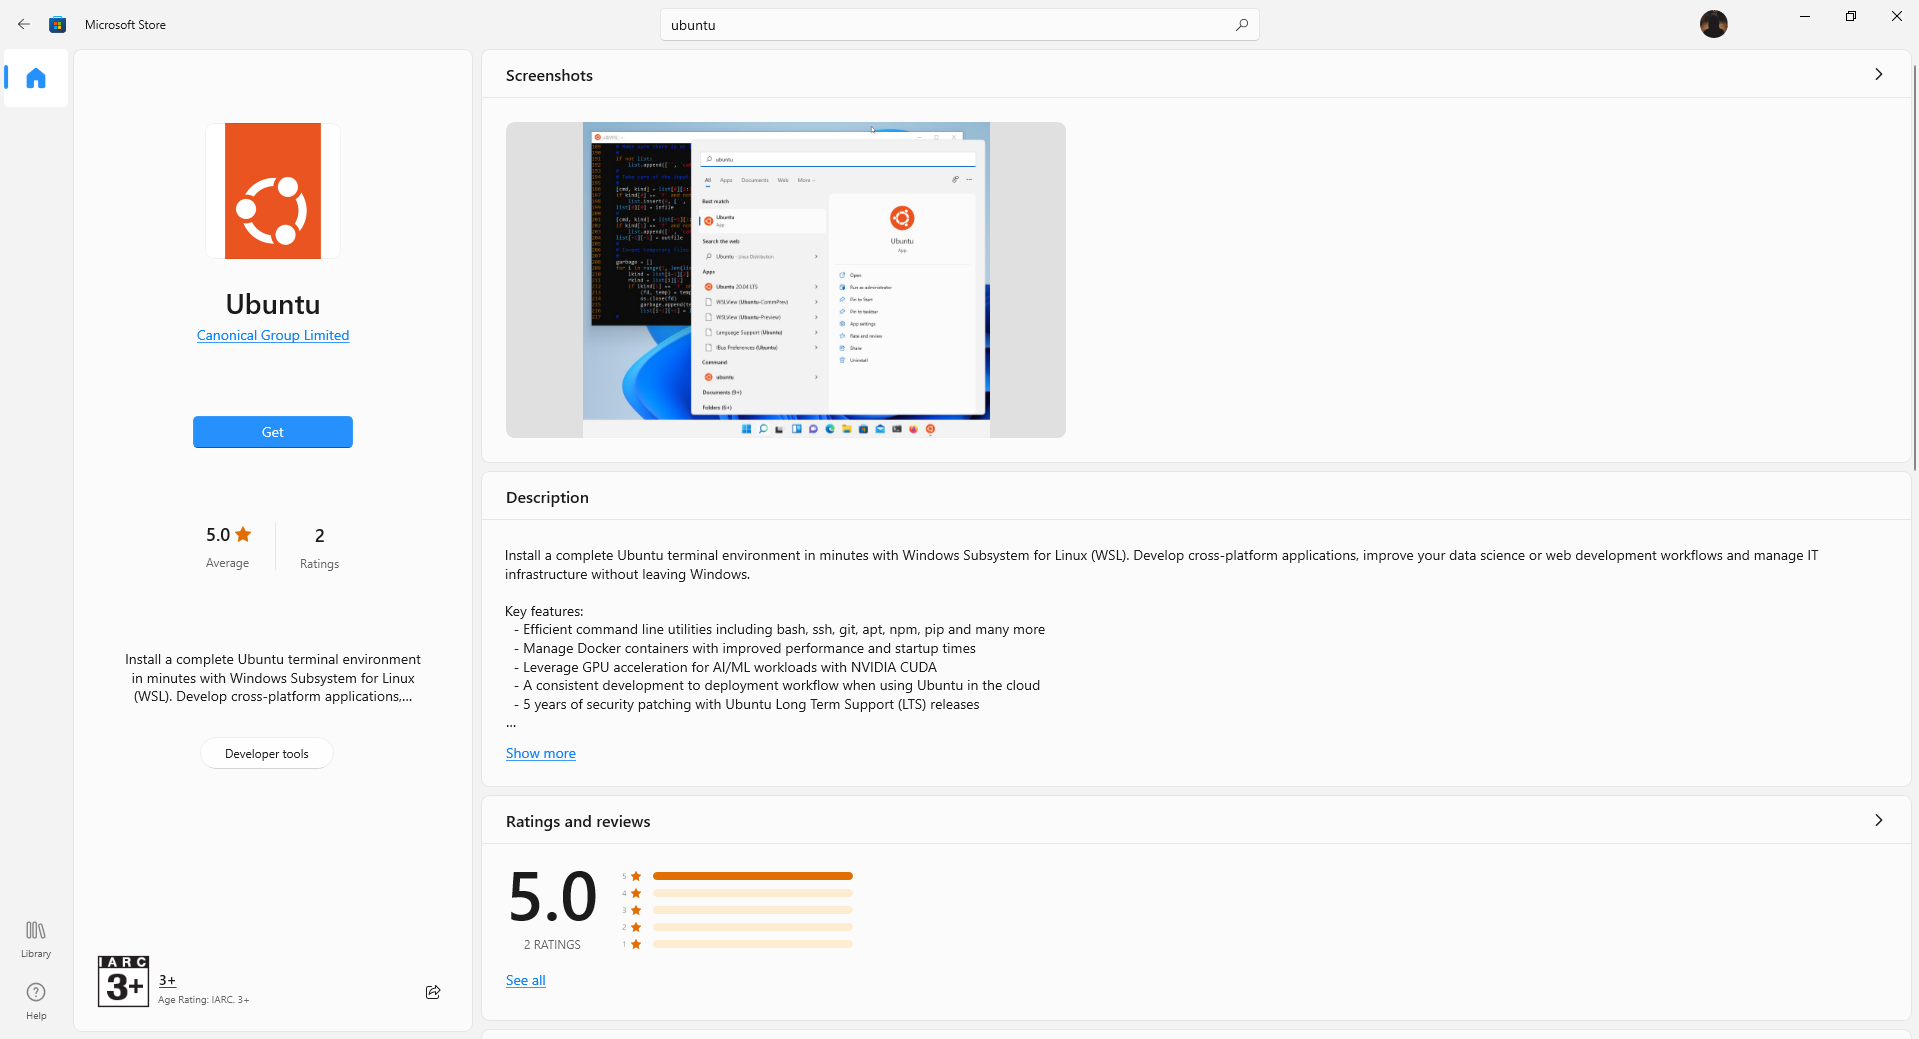
Ubuntu is required for initiating the Algorand sandbox node to run on the Docker. The version 2 of the WSL architecture specifically is used. To install Ubuntu, the simplest way is to get it directly within the Microsoft Store. Skip if already installed.

After that, check the version of the installed wsl by using the following command. The command can be ran with Windows Powershell or Command Prompt but not within Ubuntu itself.
wsl -l -v
This should returns a result as such.
  NAME                   STATE           VERSION
* Ubuntu                 Running         2
  docker-desktop-data    Running         2
  docker-desktop         Running         2
Verify that the Ubuntu's VERSION is set to 2. If it's not, then run the following command to switch the version.
wsl --set-version Ubuntu 2
For more information, check out this tutorial.
Docker Desktop
Docker is a powerful platform for developer to build, share and run applications in a containerized environment. To setup a local node for Algorand, Docker Desktop is necessary to run the daemon.
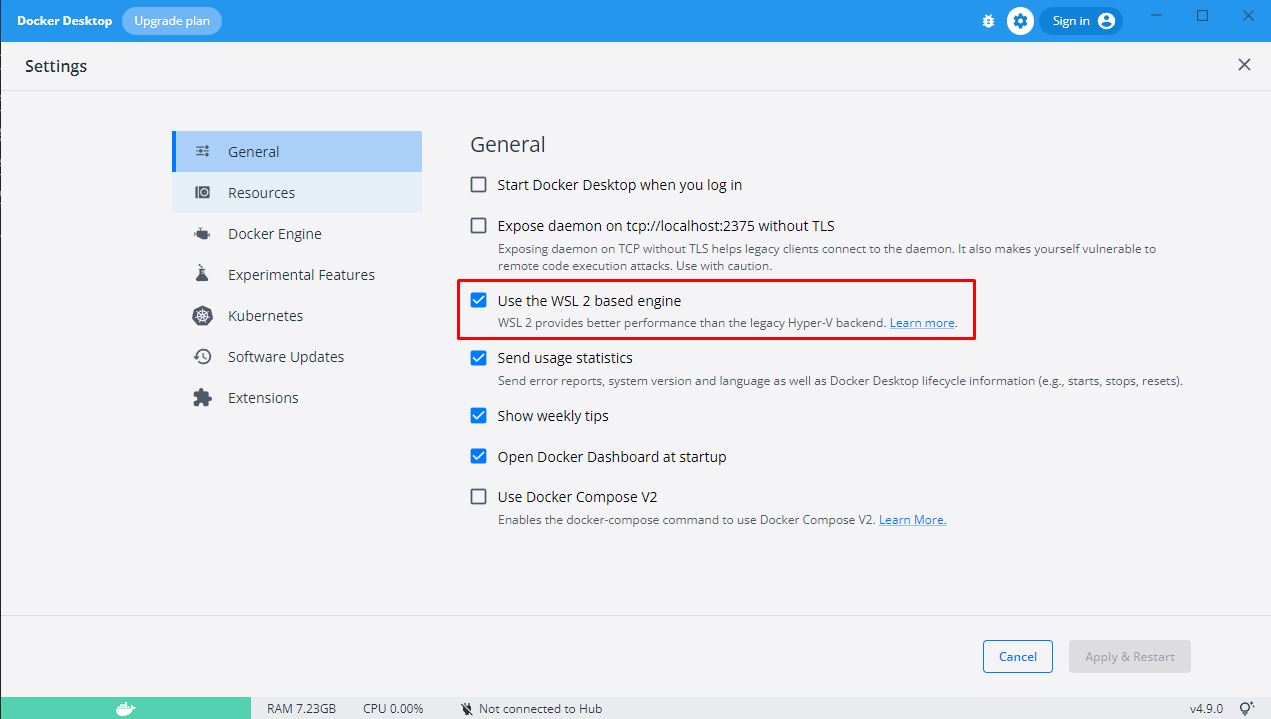
Go to the settings and make sure that "Use the WSL 2 based engine" option is checked.

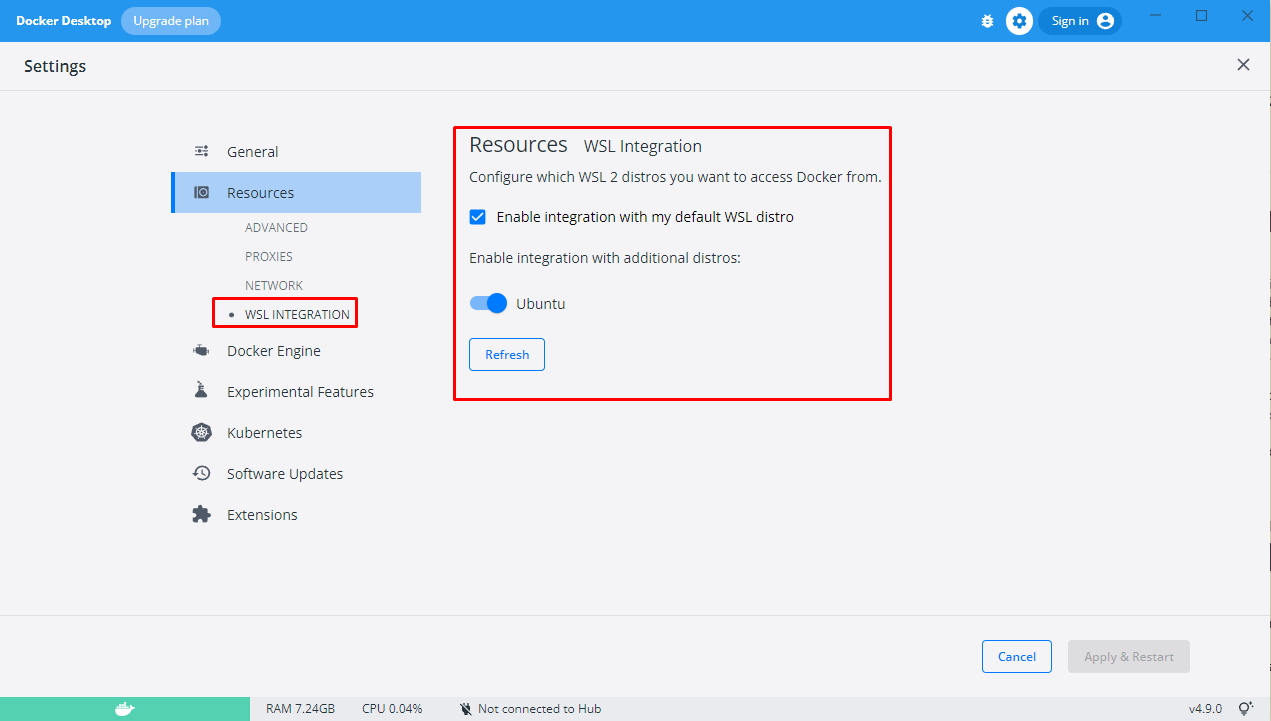
Under the Resources > WSL integration section, make sure the "Enable integration with my default WSL distro" is checked and the Ubuntu switch under "Enable integration with additional distros" is enabled.

Python
Python SDK is used for the demo. SDKs in other programming languages such as Go, JavaScript and Java is also supported. Python Homepage.
python --version
pip --version
If there are results for both of the commands such as Python 3.10.0 and pip 21.2.3, then Python is installed successfully and may proceed to install Pipenv package for easier virtual environment creation.
pip install pipenv
Algorand Sandbox
Algorand sandbox is the fast way to create a development environment. Open up the Ubuntu terminal and clone the sandbox's git repo directly from GitHub.
git clone https://github.com/algorand/sandbox.git
Project Repo
In Windows, create a project directory named algorand (for example) and change directory into the folder after that.
To create a virtual environment with Pipenv, run the following command.
pipenv shell
Install PyTeal package that is used to generate the smart contracts (Teal) in Algorand.
pipenv install pyteal
Check the list of dependencies to make sure that it is installed successfully.
pip list
Package         Version
--------------- -------
cffi            1.15.0
msgpack         1.0.4
pip             22.0.4
py-algorand-sdk 1.14.0
pycparser       2.21
pycryptodomex   3.14.1
PyNaCl          1.5.0
pyteal          0.13.0
setuptools      62.2.0
wheel           0.37.1
Besides making sure that pyteal is installed, we would like to make sure that py-algorand-sdk is installed alongside as well. If it's not, install it explicitly by pipenv install py-algorand-sdk.
After that, create a .env file with the following contents and replace the angle brackets with your own Algorand account credentials.
ALGORAND_ACCOUNT_ADDRESS      =<your-public-key>
ALGORAND_ACCOUNT_MNEMONIC     =<your-mnemonic-phrases>
Starting Node
Return to the WSL and change directory into the sandbox project that just been cloned.
cd sandbox
Run the following command to initiate the local node for testnet.
./sandbox up testnet
Make sure the Docker Desktop is up and running in the background before proceeding
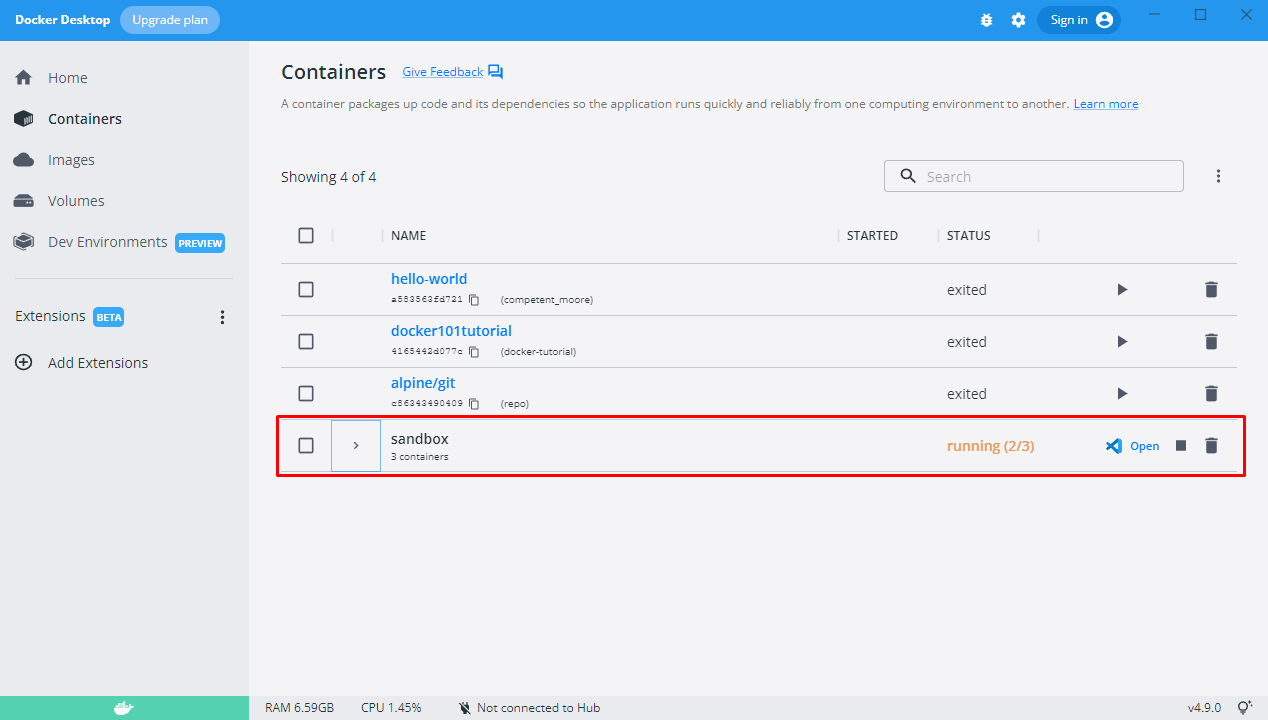
At this point, there should be a new container named "sandbox" appeared in the Docker Desktop list.

The process of starting up the local node may take some time. For first-timers, more time is spent on building the image for Docker and subsequent initialization will not rebuild the image.
This is the full output for successfully running the node. The terminal exits after the output and this is expected as it has already started up the node in the Docker successfully and that is all it matters.
Starting sandbox for: testnet
see sandbox.log for detailed progress, or use -v.
* docker containers started!
* waiting for services to initialize.
* services ready!

algod version
12885622786
3.11.2.stable [rel/stable] (commit #99b37ac0)
go-algorand is licensed with AGPLv3.0
source code available at https://github.com/algorand/go-algorand

Indexer version
Indexer disabled for this configuration.

Postgres version
postgres (PostgreSQL) 13.7

algod - goal node status
Last committed block: 25043446
Time since last block: 0.7s
Sync Time: 4.2s
Last consensus protocol: https://github.com/algorandfoundation/specs/tree/433d8e9a7274b6fca703d91213e05c7e6a589e69
Next consensus protocol: https://github.com/algorandfoundation/specs/tree/433d8e9a7274b6fca703d91213e05c7e6a589e69
Round for next consensus protocol: 25043447
Next consensus protocol supported: true
Last Catchpoint:
Genesis ID: testnet-v1.0
Genesis hash: SGO1GKSzyE7IEPItTxCByw9x8FmnrCDexi9/cOUJOiI=

indexer - health
Indexer disabled for this configuration.

Starting fast-catchup with catchpoint: 25030000#J5A66OMKPSHAZHTYCDRAD7OSNGUTVL5JR5XQHHR7CRCXPMUARXZA
* Account processing complete.
* Blocks downloaded.

Fast-catchup complete! Printing status...

algod - goal node status
Last committed block: 25043446
Sync Time: 291.2s
Catchpoint: 25030000#J5A66OMKPSHAZHTYCDRAD7OSNGUTVL5JR5XQHHR7CRCXPMUARXZA
Catchpoint total accounts: 1718866
Catchpoint accounts processed: 1718866
Catchpoint accounts verified: 1718866
Catchpoint total blocks: 1321
Catchpoint downloaded blocks: 1321
Genesis ID: testnet-v1.0
Genesis hash: SGO1GKSzyE7IEPItTxCByw9x8FmnrCDexi9/cOUJOiI=

indexer - health
Indexer disabled for this configuration.
Troubleshooting
If the progress of either processing accounts or downloading blocks stuck at 0% for a very long time, CTRL+C to exit the process and remove the existing Docker image.
But before that, we want to make sure that the repository is up to date.
git pull
After that only run the command to remove the existing Docker image.
./sandbox clean
Run the same command to startup the node.
./sandbox up testnet
Alternatively, an additional flag -v which stands for verbose can be appended to the up command for a more detailed loggings.
Test Connection
Back to the newly created project directory, add a new file called main.py and save it with the following codes.
import os
from algosdk.v2client import algod


algod_address = "http://localhost:4001"
algod_token = "aaaaaaaaaaaaaaaaaaaaaaaaaaaaaaaaaaaaaaaaaaaaaaaaaaaaaaaaaaaaaaaa"

algod_client = algod.AlgodClient(algod_token, algod_address)

my_address = os.getenv("ALGORAND_ACCOUNT_ADDRESS")

account_info = algod_client.account_info(my_address)

print(account_info)
Execute the script with python main.py and there should be a JSON result being returned.
{'address': 'XXX', 'amount': 9999000, 'amount-without-pending-rewards': 9999000, 'apps-local-state': [], 'apps-total-schema': {'num-byte-slice': 0, 'num-uint': 0}, 'assets': [], 'created-apps': [], 'created-assets': [], 'min-balance': 100000, 'pending-rewards': 0, 'reward-base': 26621, 'rewards': 0, 'round': 26666947, 'status': 'Offline', 'total-apps-opted-in': 0, 'total-assets-opted-in': 0, 'total-created-apps': 0, 'total-created-assets': 0}
Congratulations, the Algorand local development environment has been setup successfully. Now, the Python script can be executed directly on windows that interacts with the Algorand Daemon running in the background.